Trampolines are an excellent way to get exercise and fun on a hot summer day, but they come with one major drawback: damage caused by jumping on them!
If you’ve got kids who love to jump, you’ve probably already noticed that the mat on your trampoline has started to show signs of wear and tear. Thankfully, it’s not too difficult to patch small holes in your trampoline mat!
You will learn how to patch a trampoline mat hole easily on your own here. I have done it multiple times for my own use, and I have shared exclusive tips as well with this article.
Follow these easy steps to get your trampoline looking brand new again in no time at all.
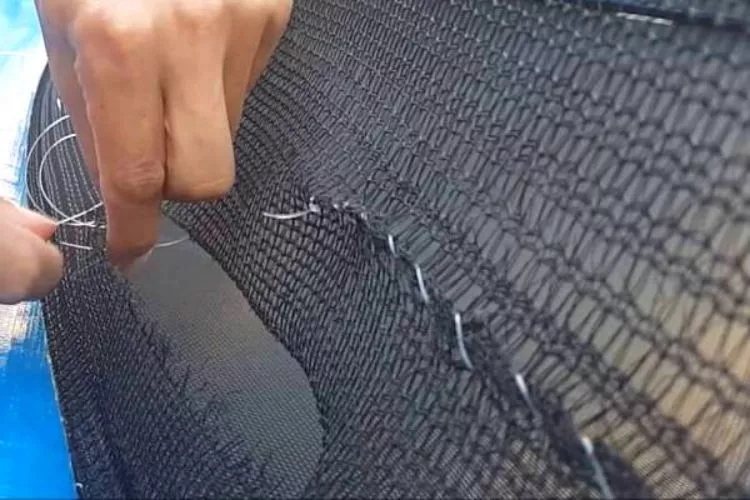
How to Patch a Trampoline Mat Hole (A Step-By-Step Guide)
Does your trampoline mat have a hole in it? Don’t worry—we’ve got you covered with the best ways to know how to patch a trampoline mat hole. Your trampoline shouldn’t be considered unusable just because there’s one small hole in it!
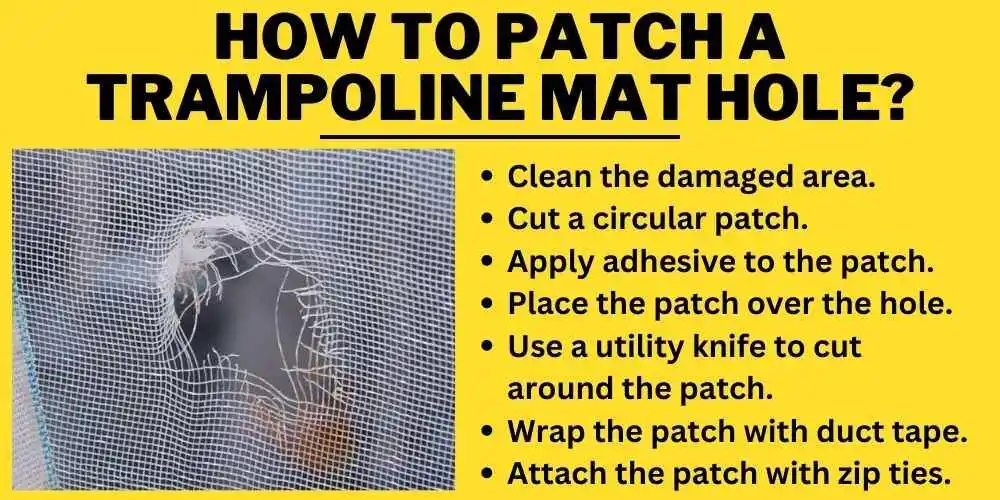
We all know that trampolines are loads of fun, and we also know that they can be dangerous as well. With proper supervision and adherence to safety precautions, your kids can still enjoy their bouncy castle without incident. All you need to do to fix your mat and keep jumping is patch the hole!
Clean the damaged area
It’s important to clean the damaged area first so that the patch will stick well. Use a stiff brush and a water-filled spray bottle. Scrub the area with the brush, then rinse it with the spray bottle. Allow it to dry before applying adhesive and patching.
If needed, use a utility knife or razor blade to cut away any torn material in preparation for placing the new fabric on top of it.
Next, measure out and cut the patch material about twice as large as the hole (or tear). The two ends should overlap slightly when finished. Apply contact cement to one side of the cloth patch: Make sure there is enough glue on the edges of both pieces of cloth.
Place one side over the hole, lining up one edge carefully with one edge of existing material. Press firmly all around until everything is stuck down securely.
Cut a circular patch
Take the patch and line it up in the center of the hole. Tape it onto the mat with masking tape, then cut off any excess. Make sure that you are placing your patch in an area with no wrinkles or folds in the mat and is as clean as possible. Repeat this process until you have patched all of your holes.
Apply adhesive to the patch
Apply the adhesive to one side of the hole, and make sure it covers about an inch on either side. Take your patch and apply it over where you just put adhesive. 2 3. Firmly press down on the patch with your fingers or a squeegee, then wait at least 5 minutes before bouncing on it again.
Place the patch over the hole
Using a utility knife, cut the excess material from around the hole. The patch should be about three inches larger than the hole on every side.
Apply some rubber cement to one of the pieces of the mat and wait for it to get tacky, then place it on top of the hole, with the cemented side facing down and touching the underside of the mat and with one edge overlapping with the other edge by an inch or so.
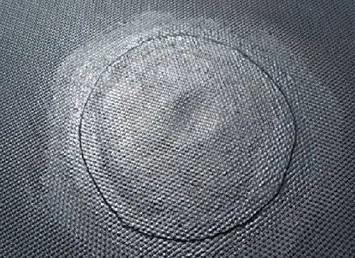
If you’re using more than one piece of material, overlap them as you did in step 1. Make sure that all edges are tucked under–you want any part of your patch to be glued down so that it doesn’t come loose over time.
Use a utility knife to cut around the patch
Clean the mat’s surface with rubbing alcohol, using your utility knife to cut off loose threads. Cut around the patch, keeping about an inch of space around all sides of the patch.
Apply glue around the patch’s perimeter and place it on top of the hole, pressing down firmly so that there are no air bubbles or wrinkles in the mat. Make sure you have at least a 1/2 inch overhang on all sides of the edge where you apply it. Wait at least 24 hours before jumping on your trampoline again!
Wrap the patch with duct tape
Find the hole on the trampoline mat, and make sure you know where all the edges are. You will need to make sure that you patch both sides of the hole, to find where each side starts and ends. Cut a piece of duct tape about 10 inches long, and lay it sticky side up on your work surface.
Attach the patch with zip ties
To patch a hole, trim the edge of the patch so that it’s as square as possible. If you have any sharp edges, use sandpaper to round them off.
Use zip ties to attach the patch tightly, making sure not to cut any of the wires in the trampoline mat below. Depending on how large your patch is, you’ll need around 8-10 zip ties, and if you’re using two patches, you’ll need 16-20 zip ties.
Repeat as necessary
There are various methods for patching a trampoline mat hole. First, clean the area around the hole with soap and water, then dry it thoroughly. Next, remove any excess dirt from the area that could potentially interfere with your patch.
You can use an adhesive remover or alcohol to clean the surface of the mat, but be sure not to get any on your skin or clothes. It may also help to take measurements of the gap to buy patches that will fit perfectly.
After gathering all the necessary materials, lay your mat down on its side and measure how large of an opening you want to be covered by your patch.
What kind of thread do you use to fix a trampoline?
Trampolines have lots of holes in them but don’t worry you can patch them up with a little bit of thread. First, cut your thread so it is the same length as the hole size. Next, tie the two ends together to make one continuous loop.
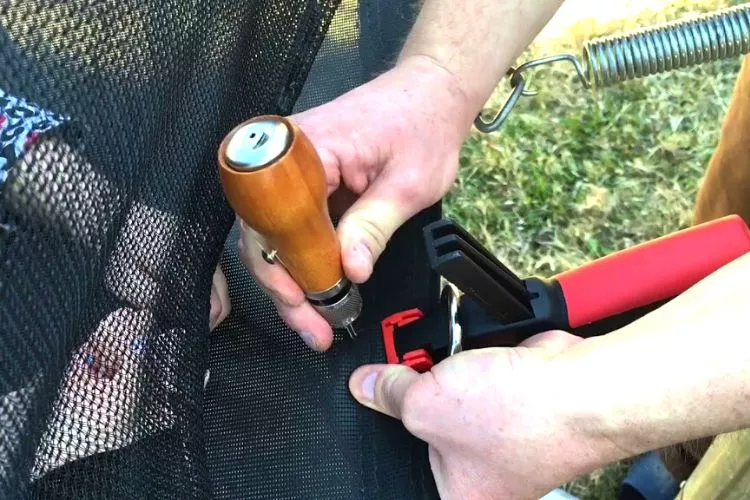
Finally, take the ends of the loop and put them over where you want to patch up the hole. Holding both ends tightly with your thumbs at either end, pull straight up on one side while pulling straight down on the other side to tighten down on both sides around where you want to fix your mat.
Trampoline Mat Repair Kit
A trampoline mat repair kit comes with all the equipment you need to repair your trampoline mat. However, the list of tools and supplies may vary depending on the type of trampoline mat you own, so it’s important to carefully review the contents of your repair kit before getting started on any repairs.
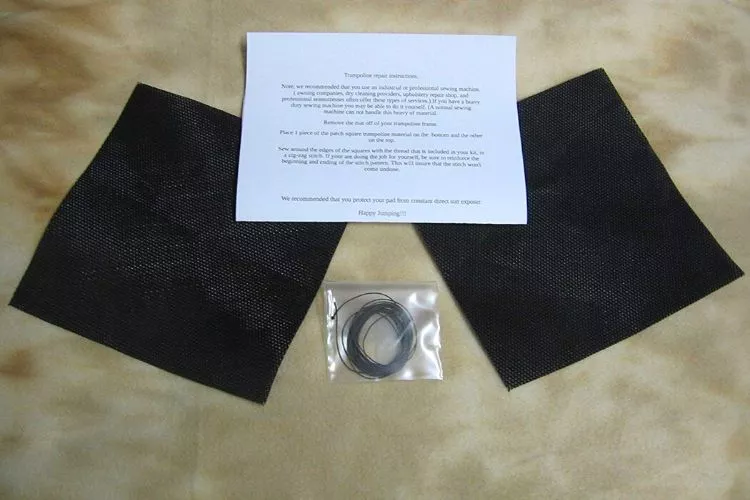
The following list describes some things typically included in trampoline mat repair kits, but it’s not guaranteed to be a complete list.
The mat
The mat is the part of the trampoline that covers the springs. It protects the jumpers from injury and holds up under weight and pressure. A typical mat will last about four years before it needs to be replaced, but if you’re using your trampoline for commercial purposes, you may need to replace it as often as every year.
The mats are easy to replace, but not all brands are compatible with all models of trampolines. If you have questions about what kind of mat is right for your particular model, call customer service or read your warranty information first.
The repair kit
A trampoline mat repair kit typically includes the following:
- The trampoline mat itself.
- A wrench for tightening bolts.
- A drill with bits to tighten screws and bolts on the frame of the trampoline mat or to drill holes into the metal frame. This is usually used if the frame has holes or cracks that need to be repaired.
- Screws, nuts, bolts, and washers for repairing holes or cracks in the frame of your trampoline mat. These are used if you cannot use a drill because they come with pre-threaded metal rods that can be screwed into place without drilling. The screws are then tightened down with washers and nuts on either side of the bolt.
The instructions
A trampoline mat is essential for any backyard trampoline, and it’s important to know how to take care of it properly. It should be replaced at least once every year, and you can do the job yourself with a trampoline mat repair kit. These kits are inexpensive and include all the tools you need to replace your old mat with a new one.
The tools
You will need tools to repair your trampoline mat: A metric ruler, scissors, needle-nose pliers, safety pins, thread, and a needle. The first step is to measure the damage. Use the metric ruler to measure from one side of the tear to the other.
Mark where you will cut with safety pins. Then cut along the marks with scissors and remove one layer of fabric using needle-nose pliers by pulling carefully on each side of the tear until it separates from the mat.
Once that’s done, use your hands and pull out any threads or excess fabric so there’s just enough room for sewing–you want it as tight as possible but not too tight, or else your stitches might pop off when you jump!
Similar Read: How To Make A Swing Without A Tree
Frequently Asked Questions (FAQs)
Can you fix a hole in a trampoline mat?
What is the best way to fix a hole in a trampoline mat? The answer is simple: patch it. It’s easy, inexpensive, and can be done in less than 30 minutes by following these ways. Clean the area around the hole with soap or an adhesive remover if there are any adhesive remnants from the old mat. This will ensure that your new patch sticks well.
How often should you replace a trampoline mat?
A good rule of thumb is that if the mat is at least 5 years old, it’s time for an upgrade. Also, if you notice your kids bouncing on the trampoline with more effort than before, or they’re landing hard on their feet when they bounce off the mat, it’s time to get a new one.
What causes holes in trampolines?
Trampolines are built from many different materials, but the most common is galvanized steel. This material can rust over time, particularly when it’s exposed to rain or high humidity. Sometimes the rust will cause small holes in the trampoline mat. These holes are usually not too large, but they can still be dangerous if you don’t take care of them quickly.
Conclusion
A trampoline mat’s job is to provide an extra layer of protection to the trampoline, while also protecting you or your children as they bounce around on it. But what happens when that layer of protection gets damaged?
You can either start jumping on the trampoline in bare feet (not recommended), or you can learn how to patch a trampoline mat hole right away! Using this step-by-step guide, you’ll be able to patch that hole and get back to bouncing in no time!


